Tuesday, October 4, 2011

Hair Show!!!!

Every year, the MATC has a hair show that all the students are required to participate in. And lucky me, I've been there so long, I got to do it twice!! Ha but no worries, it was fun! The first year I did it I had JUST started school and I was still in training. When they told us we were still required to do the hair show, I was scared because I didn't really know as much as the girls that were almost graduated. The theme was Hollywood, and I chose to do someone from old Hollywood, Elizabeth Taylor. We had to dress our model like the famous star, and do their hair and makeup to look like them. I won FIRST place!!!!!:) It was amazing! And a real confidence booster too which is what I needed at that time! Do they look alike??


For this years hair show, the theme was Disney.
We all had to choose a Disney character and
dress them up like one. I chose Esmeralda from
the Hunchback of Notre Dame and my model
was my sister, Natesa. She was perfect for the
part! I made the costume and I also made the
crown out of a metal hanger!.....Yes, a hanger!!!
And it turned out quite well if I might say so
myself:) For the hair we rolled her hair with
magnetic rollers and colored her panels so her
hair was all black. For the makeup, I did a
smoky eye with gray and black eyeshadow,
LOTS of eyeliner, strip eyelashes, darker
eyebrows, and a light color and gloss on the lips.
We got green contacts to add the final effect and
I think she looked like an amazing Esmeralda!!
  I won Most Animated Character!:)


You can make crazy look-a-likes with good makeup and
hair techniques!! All it takes is knowing how to apply the
makeup to enhance (or create) certain features and then
just copying their stye of hair and fashion. You can make
men look like women, and women look like men with the
right kind of makeup. So if you are bored one day with your
friends,give it a try! Make them look like a famous actress!
It is really fun!!! And really worth a try!

Monday, September 26, 2011

Choosing the right foundation for your face

I had a request to write a post about how to choose the right foundation for your face....this is a question a lot of people ask! I, for one, had this same issue when I first started wearing makeup.....and I also got the dreaded line from foundation on my jawline. There are a couple of things to consider before choosing a foundation.....

  1. What kind of coverage do you want? Natural, Corrective, Flawless? If you have a good complexion already, then a powder foundation will probably be the best choice for you....it is a lightweight coverage but enough to just evenly blend your skin. If you have a lot of red spots on your face or a lot of blemishes that you would like to hide, then a cream or liquid foundation along with a powder will cover them up nicely. Also, a green primer (Revlon has a great one) will help to counteract the red spots which will help the foundation cover it a lot better. If you are going for a more flawless look then a cream or liquid foundation with maximum coverage will help even out the skin tone and give you a perfected look. Always finish any cream or liquid foundation with a powder!
  2. What skin type do you have? Dry, Oily or Combination? A lot of makeup brands will have different foundations for different types of skin....If you have oily skin, do not use a foundation for dry skin. It will add even more shine and oil to your face. If you have dry skin, do not use a foundation for oily skin. It will cause premature aging because it is like "dehydration" for your skin. A combination skin type can use either kind. Always begin your foundation with a light facial moisturizer though....even if you have oily skin!
Now for the color part.....It is hard choosing the right color of foundation for the first time...especially if you shop at stores like Wal-Mart because you cant try it on! You can test foundation by sticking it on your jawline....if you cant see it when you rub it in, then it matches. There a tons of different shades out there that will match your face, you just have to make sure to BLEND it! Also, putting a powder on over it will help to blend. Bronzers match every face....even if you have fair skin. You don't have to put on a lot....just enough to add natural color to your face.

Depending on what results you want from your makeup, will depend on what color of foundation to use. Look at this picture for example: 


She wanted to add color to her face....so we used a foundation that initially matched her skin color....but then we added a powder that was 2 shades darker, and a bronzer on her cheeks, forehead, chin and top of the nose. And it blended perfectly! It even looks like it is the natural color of her skin.

As for me....my face is very fair, but the rest of my body is very tan because I don't ever tan my face ( I try to prevent fine line and wrinkles!) so I use a light colored foundation but then I use a powder and bronzer to add that natural tan to my face. It works like a charm and no one knows the difference!

If you are still having a hard time choosing the right color, come to me and I'll help you out! If you don't live near me, then I would recommend going to your nearest mall and finding a place like Sephora or MAC or even some Victoria's Secret's, that will let you sample their foundations! I also believe that Avon and Mary Kay representatives can get you samples, so you can choose the best shade for you. But don't quote me on that! It's worth a try to ask though!

Leave me comments or questions if you have any!!!!;)

Sunday, September 25, 2011

Taylor Swift "Love Story" Updo

My friend just got her bridals back and I'm so excited about them that I had to put them on here! She wanted me to style her hair like the updo on the music video "Love Story" from Taylor Swift.  And her colors are different shades of purple so she had me give her purple smoky eyes. They turned out BEAUTIFUL!!...see for yourself!!!!


 Thanks Sasha for having me do your hair and makeup for your bridals and letting me use your pictures!:)


Thursday, September 22, 2011

Flawless, Natural-Looking Makeup


The key to natural looking makeup is to use a lot of creams, browns (even pinks), and earth tones. You can be wearing a lot of makeup and still have it look natural. Or you can be wearing just a little bit of makeup and look like a clown! The amount of makeup you use does not determine how natural it looks, so keep this in mind! If you are going for a flawless, natural look then foundation and powder are a MUST.  If you choose the right color of foundation, you will not get a makeup line on your jawline. So don't be afraid to use it! If you are having a tough time choosing the best color of foundation, then I can help you out with that:)

Step 1: Always begin with a primer!! (if you don't have one, a facial moisturizer works just  great) Even if you have oily skin, you still need to begin each makeup application with a primer/moisturizer. This helps to give you a flawless look by filling in your pores and giving you a smooth canvas to work on!

Step 2: Foundation. Choose a shade that will blend with the rest of your neck. As weird as it may sound....apply liquid foundation with a brush! YES, a brush! It applies it more evenly than your fingers will and it gives you that flawless look. Concealer can be used under the eyes and foundation can be used on your eyelids. Put a light powder on top of the foundation to take away the shine. It also helps to blend the foundation.


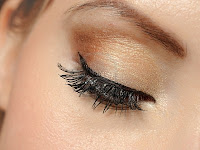
Step 3: The eyes. I usually use 3 different colors when applying eyeshadow. For a natural look I usually use a light shimmer color, a shimmer brown/pink/copper, and a deeper color for the crease. Apply the light shimmer as a highlight for underneath the brow and on the inside of your eye (by your nose). Then apply the shimmer brown (or whatever color you have chosen) to the entire eyelid. Finish off with the deeper color in the crease. Apply your eyeliner to top and bottom (optional).  Then apply your mascara. You can use brown mascara and eyeliner for a more natural look.  


Step 4: Blush. Choose a shade that is your natural color (the color your cheeks turn when you pinch them) Apply lightly over your cheekbone and brush in an upward circular motion.


Step 5: The lips. I usually finish off the look with a light lip gloss. Depending on the natural shade of your lips, choose a shade that adds color to your look, but doesn't draw attention to your lips. I usually use a golden shimmery gloss, or a brownish pink gloss.  


Hope this was easy to understand!! I tried to explain it as best as I could! Please feel free to comment or ask any questions! THANKS!:)

Wednesday, September 21, 2011

Welcome to my blog!!!

This is my first blog EVER! So if you are reading this, then you get to share my first time experience with me!:) Once I figure this thing out I will post pictures of everything that I have done thus far! And I will be doing all sorts of giveaways on here and FREE makeovers!! What could be better than that? Any advice....please give it! OH and most importantly....please leave requests of what kind of things you want to learn! I am going to make a how-to column. Even if its as simple as a french braid, or curling hair with a straightener. THANKS!!!!